Adhesion failure on specialised concrete - such as power-floated, self-levelled, or imprinted floors - is almost always caused by a non-porous surface. These finishing techniques create a dense, "glass-like" top layer that prevents paint from penetrating the concrete. Without an "open" pore structure to anchor into, the coating simply sits on the surface; any mechanical stress (like car tyres or foot traffic) will cause the paint to peel off in sheets.
-
The Non-Porous Surface: Power floating uses heavy machinery to "iron" the concrete flat, sealing the surface capillaries and making it impervious to liquids.
-
The Laitance Layer: Self-levelling compounds often develop a weak, dusty top layer called "laitance" during the drying process, which acts as a barrier to adhesion.
-
The Solution: You must mechanically or chemically "open" the concrete. If water cannot soak into the floor, paint cannot stick to it.
→ Shop EverFlor - Etch and Clean
→ Shop EverFlor - Degreaser
The Technical Culprits: Why Your Floor is Rejecting Paint
In our experience, the vast majority of troubleshooting calls regarding peeling paint lead back to one of these three substrate types. Each presents a unique challenge to the "mechanical bond" required for a successful coating.
1. Power-Floated Concrete
Power floating is a finishing process where a machine with rotating blades "trowels" the wet concrete until it is perfectly smooth and incredibly dense. While this looks great and is very hard-wearing, it effectively "closes" the pores of the concrete.
-
The Problem: The surface tension of the concrete is so high that the paint molecules cannot penetrate. It is like trying to paint a sheet of glass.
2. Self-Levelling Screeds and Compounds
These are used to level out uneven floors before a final finish. During the curing process, water migrates to the surface, bringing fine particles of cement and lime with it.
-
The Problem: This creates Laitance - a thin, brittle, milky layer. While it looks solid, it is structurally weak. When you paint over it, the paint sticks to the laitance, but the laitance isn't properly stuck to the floor. The paint eventually pulls the laitance up with it.
3. Imprinted and Treated Concrete
Concrete that has been stamped, colored, or treated with "curing membranes" or "hardeners" often contains waxes or silicates.
-
The Problem: These additives are designed to repel moisture and stains. Unfortunately, they also repel paint. If these aren't removed, the coating will "crawl" or bead up during application and fail to bond.
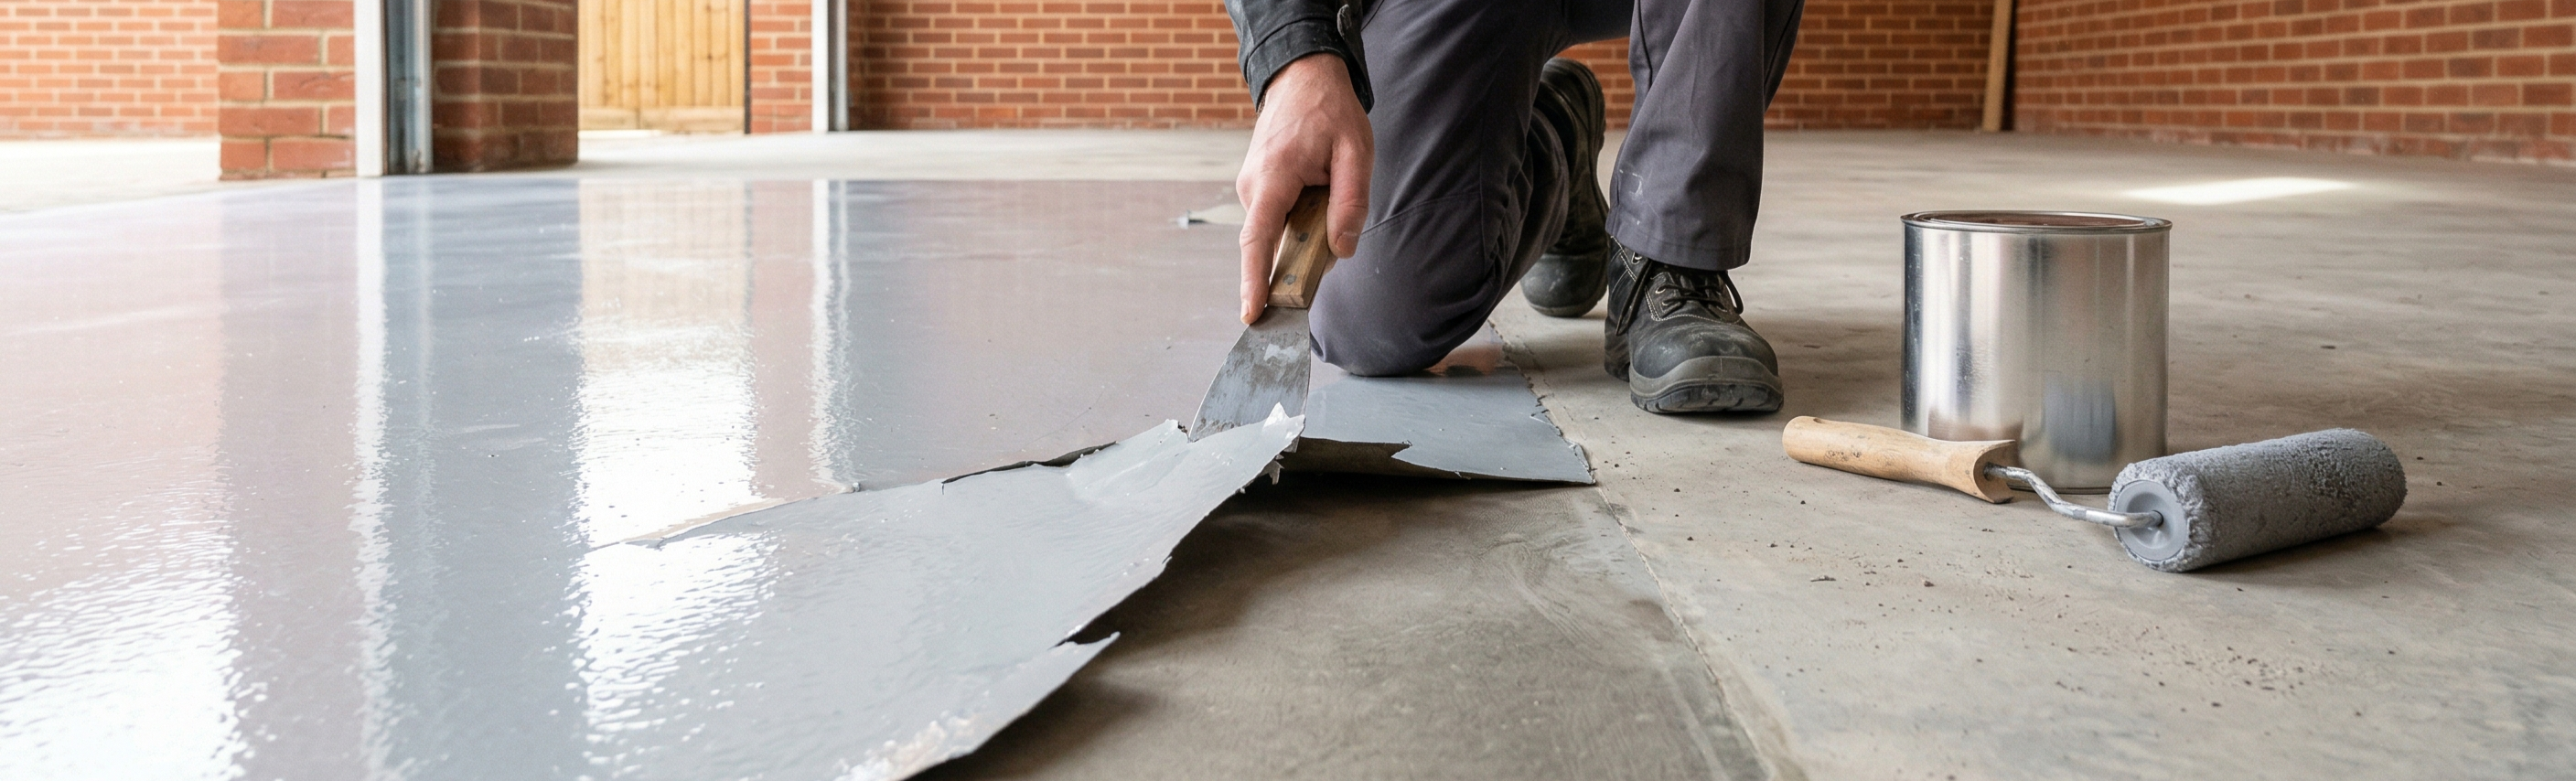
The Solution: The "Three Pillars" of Preparation
To fix or prevent adhesion failure, you must transform the floor from a "non-porous" state to a "thirsty" state. This requires a systematic approach to preparation.
Mechanical or Chemical Etching
You need to create a "profile" (microscopic roughness) for the paint to grab onto.
-
Acid Etching: Using a specialised acid solution reacts with the free lime in the concrete to eat away the "glassy" top layer, opening the capillaries.
-
Mechanical Etching (Grinding): For very dense power-floated floors, mechanical grinding is the gold standard. It physically removes the top layer of concrete to reveal the porous aggregate beneath.
→ Read our Guide to Acid vs. Mechanical Etching
Laitance Removal
If you are dealing with a self-levelling compound, you must remove the dusty surface layer.
-
The Method: This is usually done through light sanding or "scrubbing" with a stiff brush and water. If you can scratch the surface with a coin and produce a white powder, the laitance is still there and needs further work.
→ Read our guide on How to Identify and Remove Concrete Laitance
Cleaning and Degreasing
Even a perfectly etched floor will fail if there is "invisible" contamination like oil, grease, or tyre silicone.
-
The Method: Use a high-strength industrial degreaser. Standard household detergents often contain "lanolin" or oils that can cause further adhesion issues.
→ Check our our Guide to Cleaning and Degreasing Concrete
How to Test Your Floor Before Painting (The "Sponge" Test)
Before you open a single tin of paint, you should perform the Water Drop Test.
Pour a small amount of water onto various parts of your dry floor.
-
Success: If the water turns the concrete dark and disappears within 30-60 seconds, your floor is porous and ready for paint.
-
Failure: If the water beads up like it’s on a freshly waxed car, do not paint. You must repeat your etching or grinding process until the water soaks in.
Honest Trade-offs: Prep Time vs. Project Life
Cutting Corners Cost: Preparation is the least enjoyable part of the job, often taking 80% of the total project time. However, a floor that is properly etched and cleaned will last 10+ years. A floor that is painted over an unprepared power-floated surface will often fail within the first 6 months.
The Primer Myth: Many customers ask if they can just use a "stronger primer" to avoid grinding. In the world of power-floated concrete, there is no "magic primer" that can overcome a closed surface. The primer needs pores to sit in; if the pores are closed, the primer will fail just as fast as the topcoat.
Share:
Painted Floor too Slippery? Benefits and Applications of Anti-Slip Floor Paint